WARNING: THIS IS STILL SKETCH
This is article about journay of creating interactive assistant in python. Cambot is a project for AI course at University of Wroclaw. It was created by me and Keicam. All Sources can be found here.
Project description
Our main goal was to create interactive assistant, which would be very easy to expand with a new features.
We decided to use python because it is very easy in both learning and prototyping (due to its dynamic typing). The big adventage of python is that it already has a lot of plugins and addons. As an operating system to run this application we chose GNU/Linux. It runs on normal computers and embedded devices like raspberry pi. We tried to use as much external programs as possible, which helped us to get our goal.
For speech recognision we used module SpeechRecognition, which bases on google speech recognision system. It’s very easy to use, however what really made our mind, was that it has already a big dictionary. We tried to use sphinx but it was very hard to get things running and we had very poor results. SpeechRecognition is not perfect module because it contains some loops where condition is just “True” and this locks thread. We created our own thread and packed this module code there to get more control on it.
Considering speak synthesizer, we used espeak. It’s very simple and it gave us everything we needed. In this project we had also use face recognision. Python has a lot of very good examples of opencv use. As a result, it was very easy to implement in our project.
Regarding camera holder, we tried to use stuff that is very cheap and easy to built. We tried to keep it as simple as possible. To control arduino we used simply echo script. When serial device is not initialized then it needs to be initialized somehow. For this pourpuse we are used minicom. What we had to do is to just open this serial with minicom and leave window somewhere behind.
Camera that we used is Sony Eye camera for PS3. We used it because it was designed to do this stuff and it was the only camera i had that time in my flat. If You notice some problems with recognision, please ensure that the room in which You are using this device has enough light.
Features
This project is still in begining state and it has big possibility to evolve. Current features that are implemented:
- It has interactive command line
- It can recognise voice
- It can say result of query
- check mails (reads unreaded mail snippets)
- check callendar (reads 10 next meetings)
- check weather
- control camera
- say yes/no with camera
Preparation
To build this project You will need:
- Arduino uno or nano
- Sony Eye Camera PS3
- Pan/Tilt Bracket (You can find it here)
- 2 servos
In my case I had one spare arduino and PS3 camera and I bought kit here
Workspace Preparation
We prefer to use linux as workspace OS because of reasons. Software that You will need:
- Arduino IDE
- minicom(optional)
- python (we used 2.7)
We tested it on Arch linux and Ubuntu so it shouldn’t be problem with only choosen one distro.
Building stand
First what You will need to do it will be setup Pan/Tilt Bracket. Instruction is included in kit but in case You lost it or something happen You can find it here
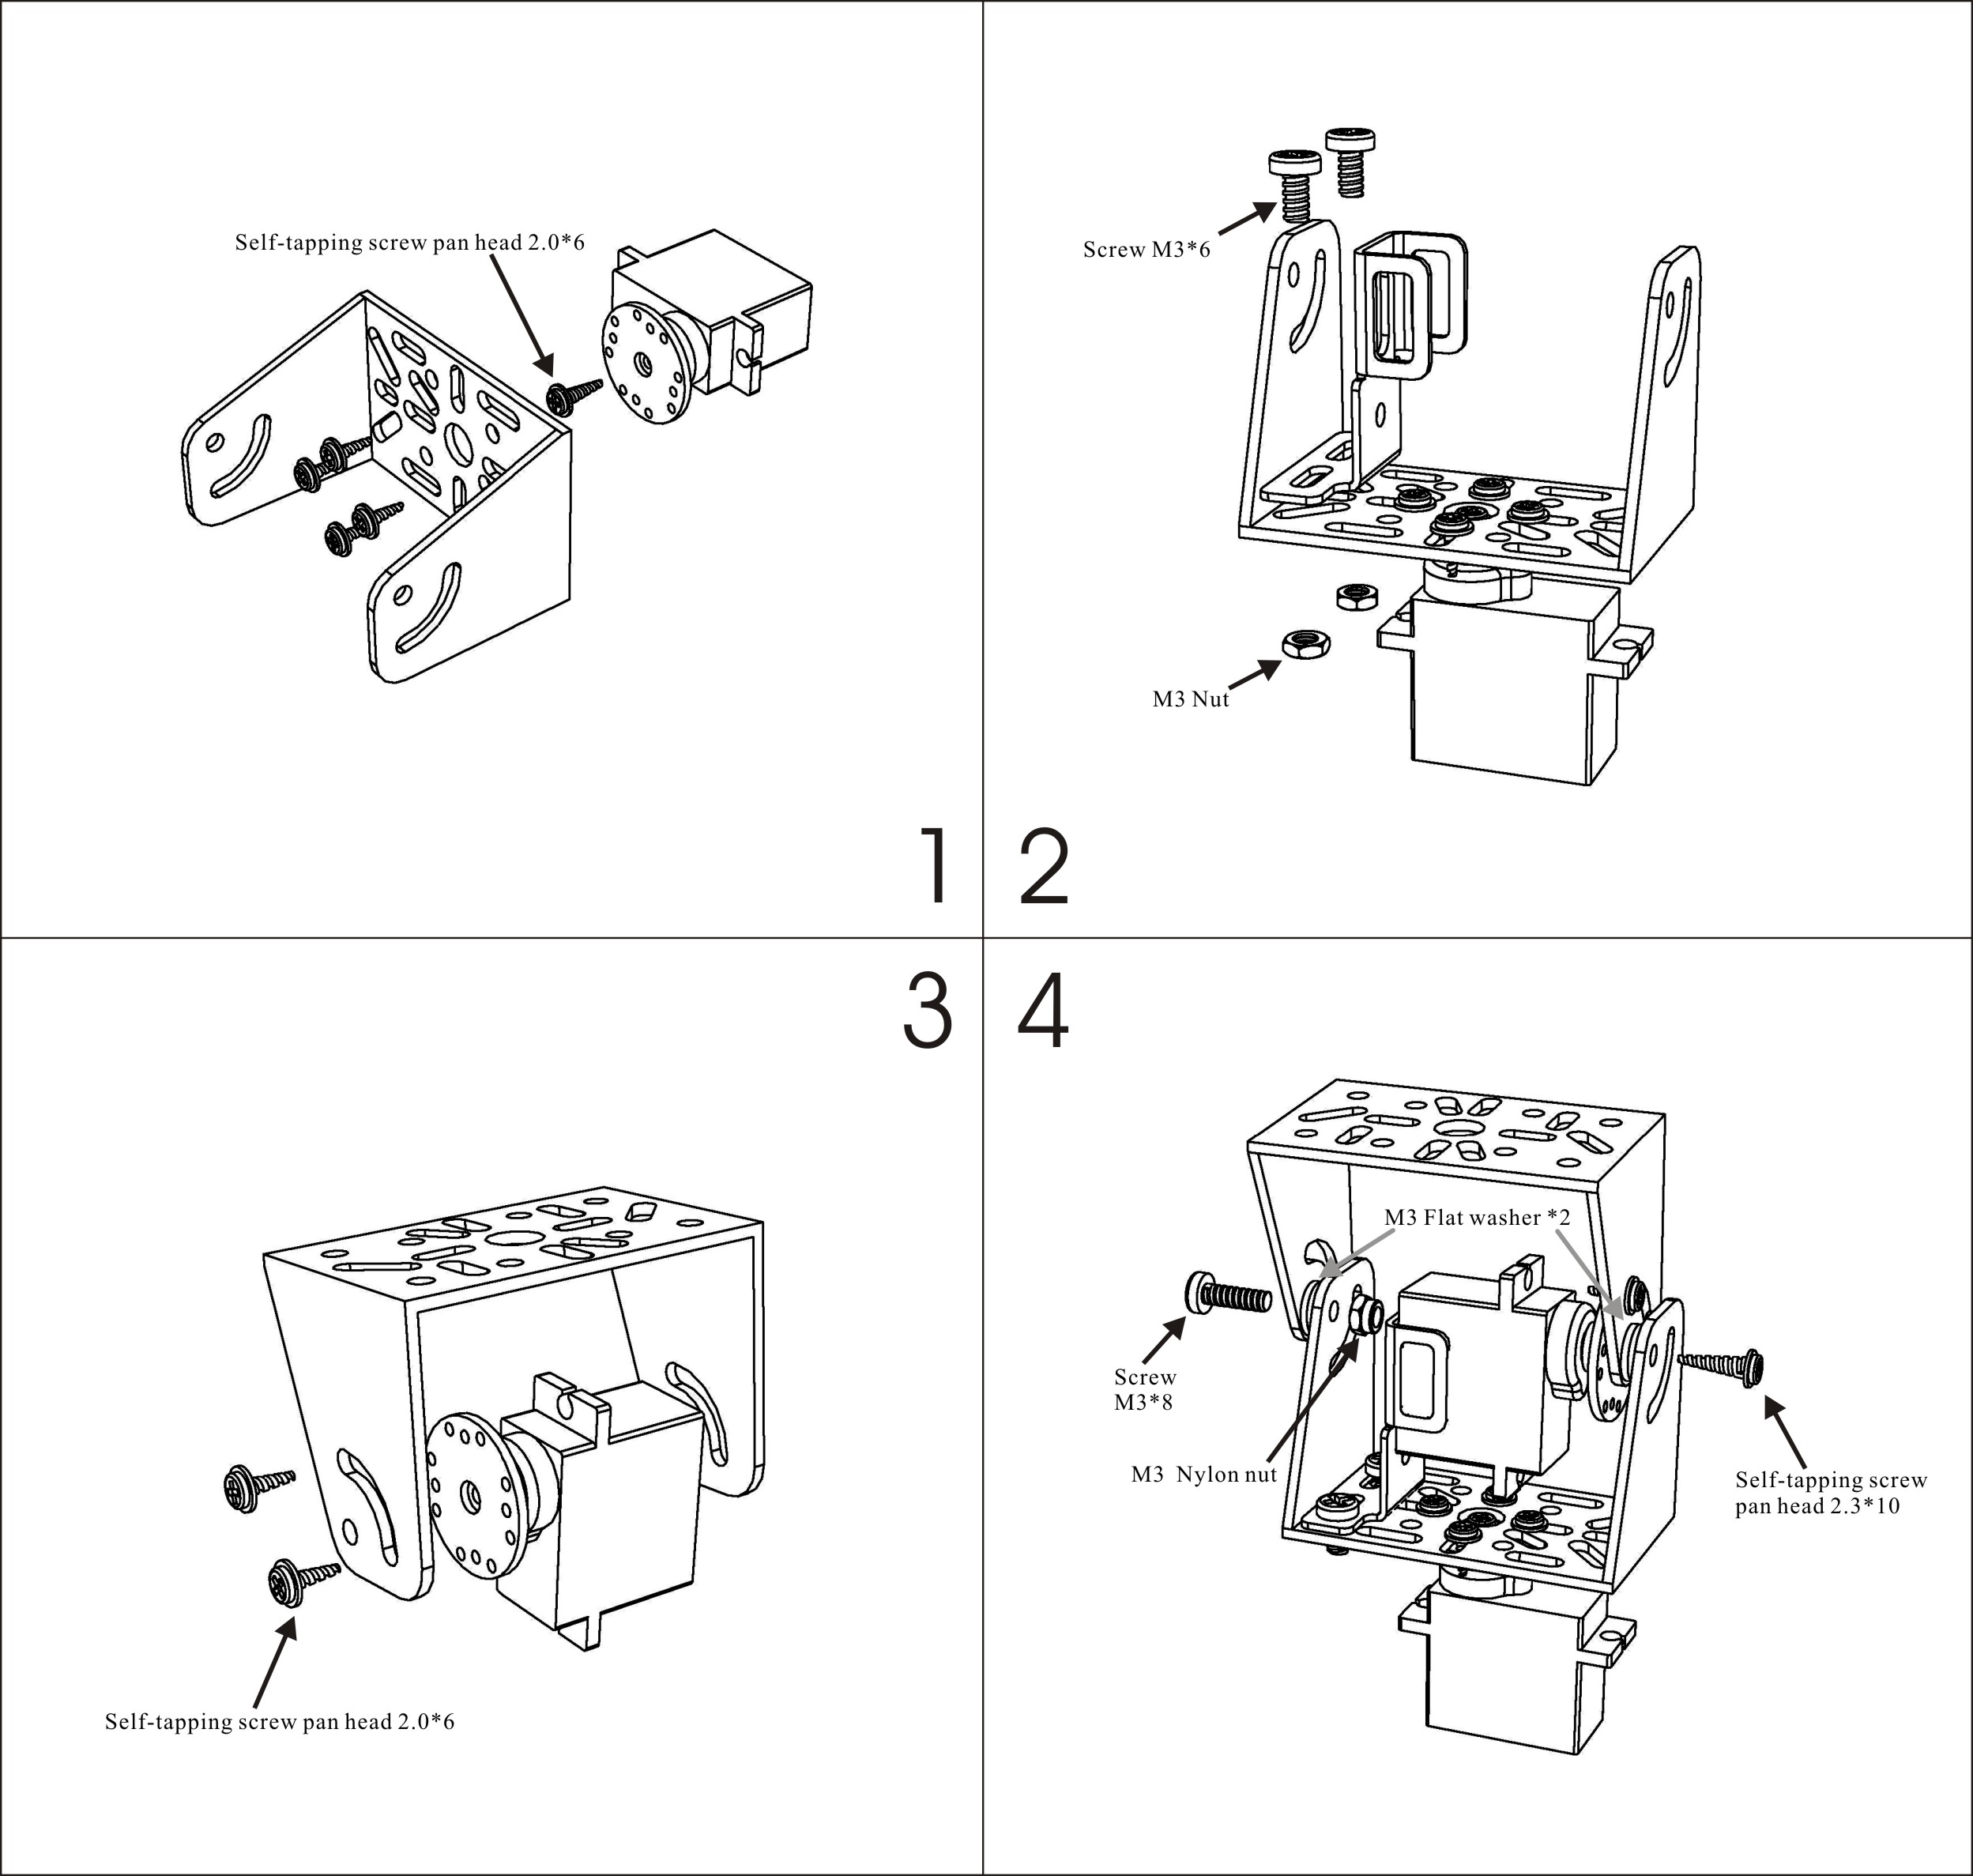
Next step it will be connecting somehow camera to this stand. I used zip straps to do this In way that is shown in picture below

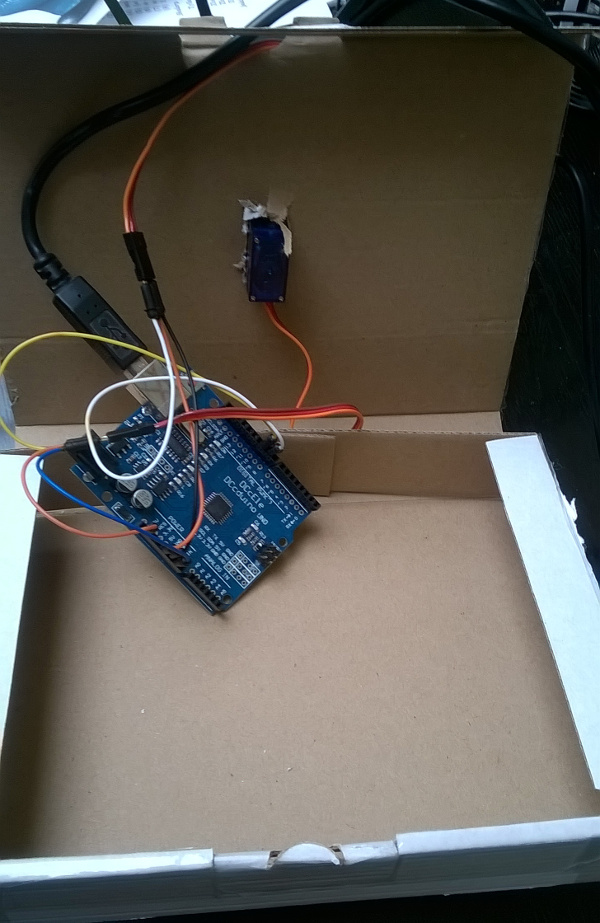
After connecting camera You need to have stable stand. In my case I used box from kit that I bought. I made hole for servo on top of that box and I put inside Arduino uno (exactly it’s equivalent). Other cables You can put just like on this picture
Sketch for arduino You can find in repository at arduino/tilt.ino. If You don’t know how to upload arduino sketches I would prefer to send You to arduino getting started article.
Connecting pins to arduino:
| Arduino | destination |
|---|---|
| VCC | Servo 1 RED |
| VCC | Servo 2 RED |
| GND | Servo 1 BROWN |
| GND | Servo 2 BROWN |
| PIN 9 | Servo 2 ORANGE |
| PIN 10 | Servo 1 ORANGE |
Where Servo 1 is the servo partially in box and it’s for X axis and Servo 2 is Y axis
Getting sources and running app
You will need install:
- pywapi (arch: yaourt -S aur/python2-pywapi)
- SpeechRecognition (arch: pip2 install SpeechRecognition)
- httplib2 (arch: yaourt -S community/python2-httplib2)
- googleapiclient (arch: yaourt -S community/python2-google-api-python-client)
- dateutil (arch: yaourt -S community/python2-dateutil)
- opencv (arch: yaourt -S extra/opencv)
- numpy (arch: yaourt -S python2-numpy)
- pyaudio (arch: yaourt -S aur/python2-pyaudio)
- espeak (arch: yaourt -S espeak)
After You install this You will need create application on google dev website and download json. Better instruction You will find here:
“https://developers.google.com/api-client-library/python/start/get_started”
When You get this file put it in directory with project.
That’s all. You should be able to run this application and have fun interacting with it :)